- July 8, 2019
- fashionads@sxediomodas.com
- (0)
- DIY Fashion
Table of Contents
T-shirt printing at home
Creating your own custom T-shirt designs at home is not just a way to express your creativity, but it also offers a personal touch to your wardrobe or makes for a thoughtful handmade gift.
With several DIY methods available, from traditional screen printing to modern iron-on transfers, there’s a technique to suit every skill level and artistic preference.
Let’s dive into some of the most popular and accessible methods for custom T-shirt printing at home.
Introduction to DIY T-Shirt Printing
DIY T-shirt printing is an engaging, fun activity that allows you to bring your designs to life.
Whether you’re looking to make a statement, support a cause, or simply wear something unique, these methods will guide you through creating wearable art from the comfort of your home.
Preparing Your Workspace and Materials
Before starting, ensure you have a clean, flat surface to work on and gather all necessary materials.
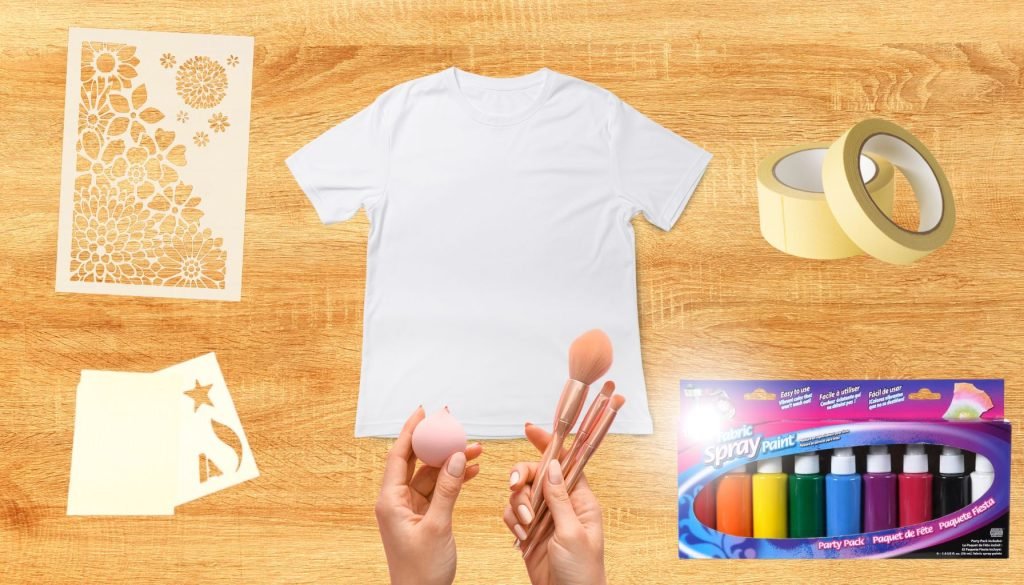
Common supplies include plain T-shirts, fabric paint or ink, brushes or sponges, and your chosen method’s specific tools.
Pre-washing your T-shirts without fabric softener will ensure the paint adheres properly.
Method 1: Stencil Printing
T-shirt printing at home

Materials Needed:
- Pre-cut stencil or sturdy paper/cardboard for DIY stencils
- Fabric paint or spray paint
- Sponge or brush
- Masking tape
Step-by-Step Guide:
- Design and Cut Your Stencil: Create your design on paper or a computer and cut it out on stencil paper or cardboard. For intricate designs, a craft knife works best.
- Secure the Stencil: Use masking tape to position your stencil on the T-shirt. Place a piece of cardboard inside the shirt to prevent paint from seeping through.
- Apply Paint: Using a sponge or brush, dab or spray paint over the stencil. Be sure to apply an even coat to prevent bleeding.
- Reveal Your Design: Carefully remove the stencil while the paint is still wet. Allow your T-shirt to dry completely according to the paint instructions.
Method 2: Screen Printing
T-shirt printing at home

Step-by-Step Guide:
- Prepare Your Screen: Mix the photo emulsion and sensitizer according to the instructions, then apply a thin layer to your screen. Let it dry in a dark place.
- Expose Your Design: Place your transparency on the screen and expose it to bright light. The areas covered by your design will remain soft.
- Wash Out Your Screen: After exposure, wash out the screen. The design areas will wash away, leaving a stencil of your design.
- Print Your Shirt: Place the screen on your shirt (with cardboard inside). Apply ink across the top of the screen. Using a squeegee, drag the ink across the design, pressing firmly. Lift the screen to reveal your design.
Method 3: Iron-on Transfers
T-shirt printing at home

Materials Needed:
- Inkjet printer
- Iron-on transfer paper
- Iron (no steam)
- Plain T-shirt
Step-by-Step Guide:
- Print Your Design: Print your design onto the iron-on transfer paper. Remember, your design should be mirrored before printing.
- Prepare the T-Shirt: Place your T-shirt on a flat, hard surface. Iron the area where you’ll place the design to remove any wrinkles.
- Apply the Transfer: Place the transfer paper onto the T-shirt with the design facing down. Iron the paper in a circular motion, applying firm pressure for the recommended time.
- Peel Off the Backing: Once cooled, carefully peel away the paper backing to reveal your design.
Aftercare for Your Custom T-Shirts
To ensure the longevity of your printed T-shirts, follow these care instructions:
- Wait at least 24 hours before washing.
- Turn the T-shirt inside out before washing.
- Use cold water and a gentle cycle.
- Air dry when possible, or use a low heat setting on your dryer.
Conclusion
DIY T-shirt printing is a rewarding project that adds a personal touch to your clothing.
Whether you choose the artistic approach of stencil printing, the professional look of screen printing, or the simplicity of iron-on transfers, each method offers its own unique charm and satisfaction.
With a little practice, you can master these techniques and start producing custom T-shirts for yourself, your friends, and your family.
Remember, the key to great results is patience, practice, and letting your creativity flow.
T-shirt printing at home instructions ends here.
